Welcome, Lykkers! In this recipe, we are going to create a classic French-style apricot tart that is loved for its simple elegance and comforting flavor. It combines a crisp, buttery crust with soft, juicy apricots on top, forming a dessert that feels both homemade and refined. The beauty of this tart lies in its balance.
The crust is light yet crisp, while the apricots bring a gentle sweetness with a slight tang that keeps every bite refreshing. Once baked together, the flavors blend beautifully into a warm, fragrant dessert that is perfect for sharing at any time of the day. Let’s move forward step by step and make everything clear and easy to follow.
Ingredients We Need
To make everything smooth, we first prepare all ingredients.
For the crust:
- 1 1/3 cups all-purpose flour (about 190 g)
- 1 tablespoon sugar
- 8 tablespoons cold unsalted butter (about 115 g), cut into small cubes
- 1 large egg
- 1 to 2 tablespoons cold water
For the filling:
- 3 tablespoons corn starch
- 1/4 cup sugar
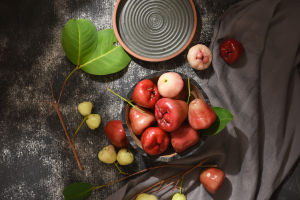
- About 3 1/2 cups fresh apricot halves (pitted and cut)
For finishing glaze:
- 1/2 cup apricot jam
- 3 tablespoons water
Optional: if we like a sweeter taste, we can add extra sugar to the apricots.
Step 1: Preparing the Tart Dough
We start by making the dough for the crust.
1. Place flour and 1 tablespoon sugar into a food processor.
2. Pulse a few times so they mix evenly.
3. Add cold butter cubes gradually while pulsing. The mixture should look crumbly, like small grains forming together.
4. In a small bowl, beat 1 egg with 1 to 2 tablespoons cold water.
5. Slowly pour this liquid into the mixture while processing.
6. Continue until the dough begins to form into a soft ball.
Once the dough forms, remove it and place it on a lightly floured surface. Gently press and fold it 4 to 5 times until it becomes smooth and not sticky.
Shape it into a round disc, wrap it lightly, and place it in the refrigerator for about 15 minutes.
Step 2: Shaping the Tart Base
Now we prepare the tart shell.
1. Take out the chilled dough.
2. Roll it on a lightly floured surface into a circle large enough to fit a 9 to 11-inch tart dish.
3. Carefully lift the dough by rolling it around a rolling pin.
4. Transfer it into the tart dish and gently press it into the bottom and sides.
5. Use a rolling pin on top edges to cut off extra dough.
6. Use a fork to lightly poke holes across the base to prevent air bubbles.
Now the crust is ready for filling.
Step 3: Adding the Apricot Filling
This step brings the tart to life.
1. Sprinkle corn starch evenly across the base. This helps absorb juice during baking.
2. Add sugar over the base layer.
3. Arrange apricot halves on top, placing them closely and neatly. We want full coverage so every slice has fruit.
If we prefer a sweeter taste, we can sprinkle a small extra amount of sugar over the apricots.
Step 4: Baking the Tart
Now we bake the tart in two stages.
1. Preheat the oven to 475°F (about 246°C).
2. Place the tart on the lowest rack and bake for 10 minutes.
3. Reduce temperature to 425°F (about 218°C).
4. Continue baking for about 30 minutes.
During baking, the crust turns golden and crisp. The apricots soften and release their natural juices, creating a gentle bubbling effect on top.
Step 5: Cooling and Glazing
After baking, we carefully remove the tart from the oven.
1. Take it out and let it cool slightly.
2. Remove it from the tart dish and place it on a cooling rack.
3. Mix apricot jam with water until smooth.
4. Brush the glaze gently over the warm tart surface.
This glaze adds shine and enhances the fruity aroma.
Let the tart cool completely before slicing.
A Sweet Moment to Share
Lykkers, this apricot tart shows us how a few simple ingredients can turn into something truly delightful. Each step is easy to follow, and the result is a golden, fruity dessert that feels warm, comforting, and made with care at home.
We hope you enjoy making it together with us, step by step. Try it in your own kitchen, share it with the people around you, and take a moment to enjoy the cozy feeling it brings when it comes out of the oven.